
How To Mount a Staghorn Fern
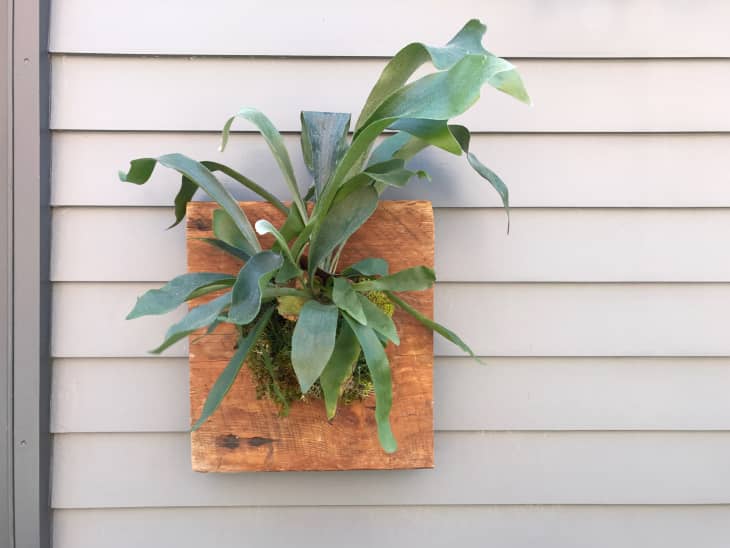
It’s ok, go ahead and laugh… and then get your mind out of the gutter. But if rare, unusual statement plants cause your heart to flutter, then the Platycerium is for you. This tutorial will show you how to mount your stag to a piece of wood, then properly care for your new living art!
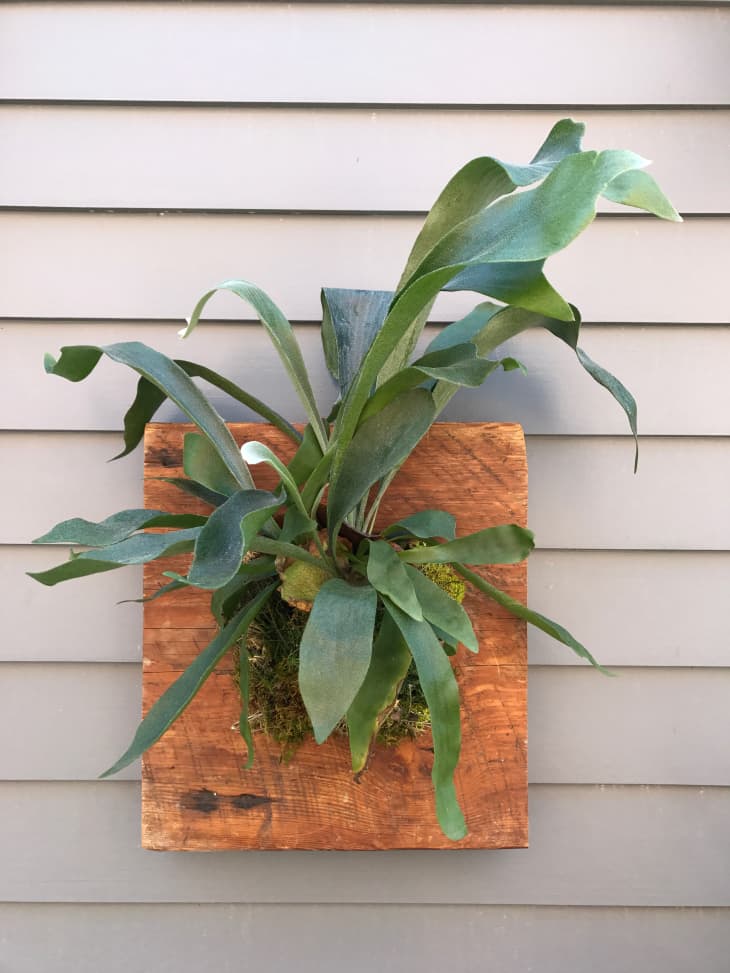
Like orchids, the staghorn fern (Platycerium) is an epiphyte, which means they do not require soil to grow but attach to and gain nutrients from other plants, while not harming the host plant. They have two sets of leaves that grow, sterile and fertile. The sterile leaves usually form a flat shield that covers the roots and helps it attach to a support. While they might look like they are dead — they aren’t. Do not pick these leaves off! The fertile leaves emerge from the center of the shield-like leaves and form the staghorn ‘antlers’ that gives this fern its name.
What You Need
- Potted staghorn fern
- Sphagnum moss
- Monofilament/fishing line
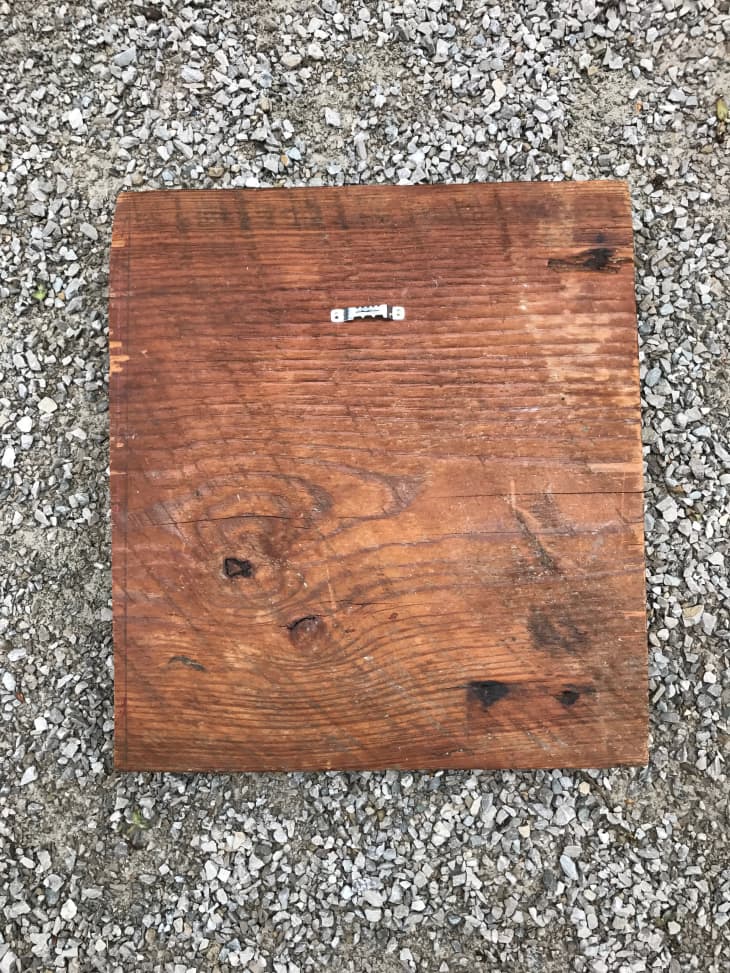
- Wood board (see tips below)
- Picture wire or hanging bracket
- Nails
- Hammer
Tip: When it comes to choosing your wooden board, you have a wide variety to choose from: an old plaque, piece of driftwood, large piece of bark, or even a slatted orchid basket will all work. (If you live in a warmer climate, you can actually mount your stag directly on a tree!) But know that, while these ferns are slow growers, they can get very big in size over time. The larger the board you start with, the longer your stag will grow undisturbed. If you use a small board, you will very likely have to re-mount your stag on a larger board in the future.
Instructions
1. Attach the hanging hardware to the back of the mounting surface, making sure what you choose is the appropriate size for the surface and weight of the board and plant. Remember, your fern is going to grow bigger, causing the weight and balance of the board to shift.
Tip: Although I used the bracket above, picture wire provides greater flexibility dealing with these issues, especially if you plan on moving your fern outside.
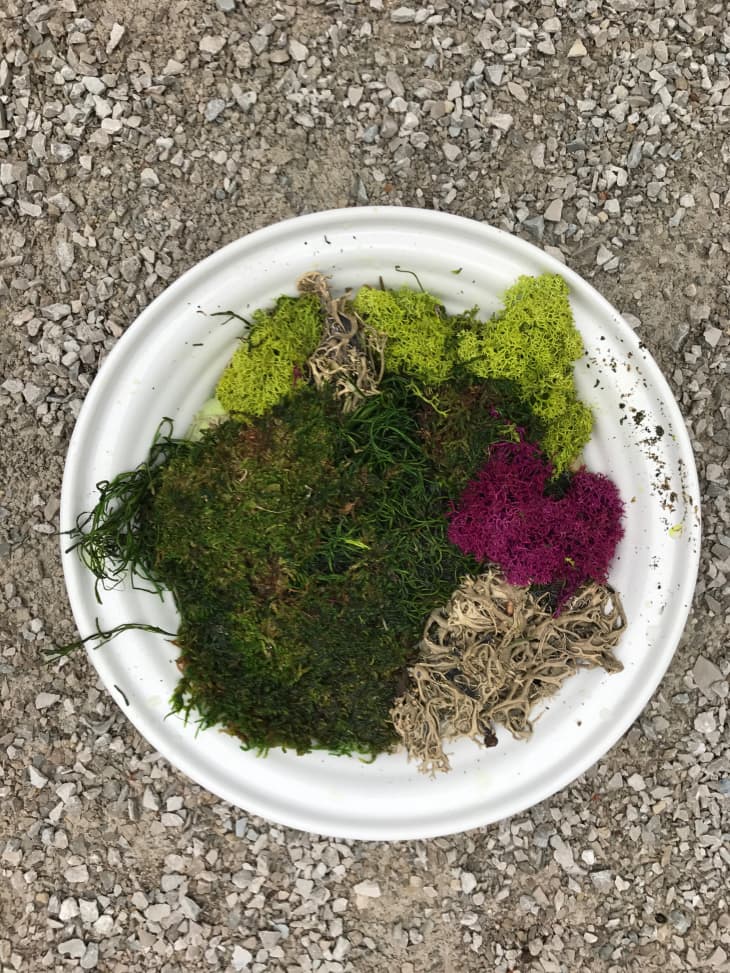
2. Soak the moss in water until it is saturated. Wring it out so it is wet but not dripping.
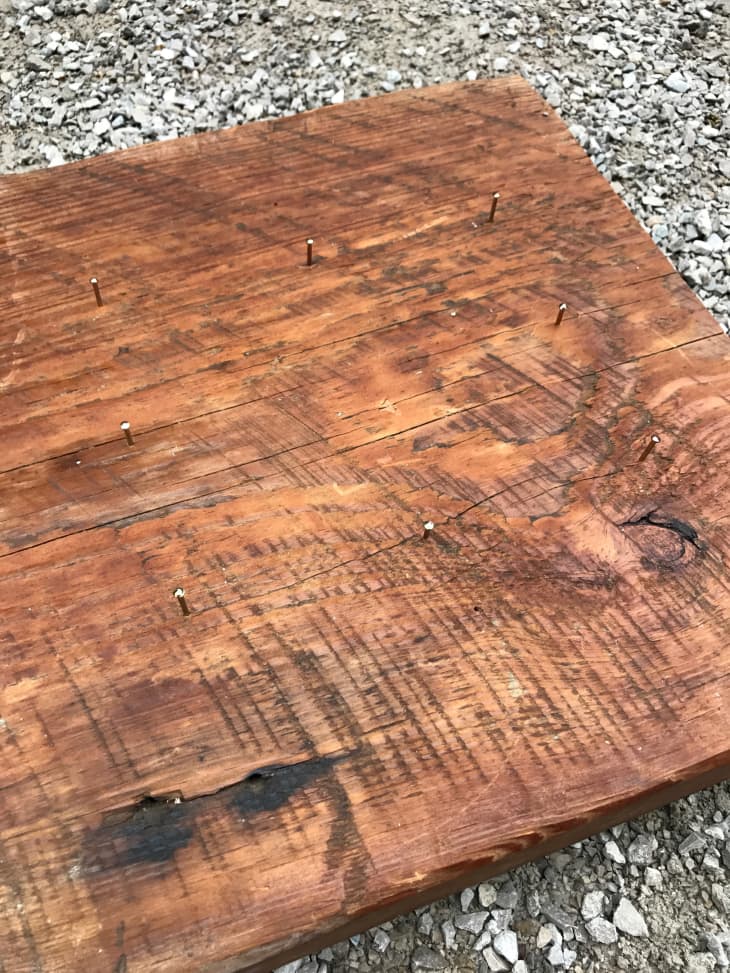
3. Measure and mark the nail placement for your board. You want the nails on the board to be a little wider than the diameter of the plant’s basal plate. Hammer your nails into the board.
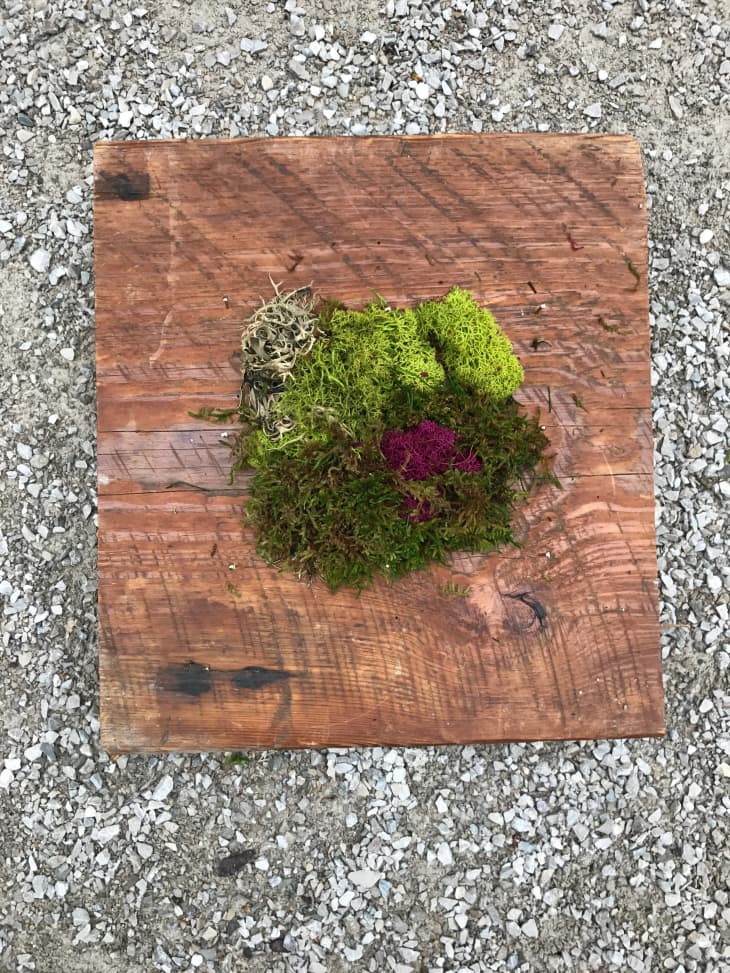
4. Create a bed of damp sphagnum moss on the frame or mounting surface. Shape the moss so the bed is shallower on the top and slightly bulkier on the bottom.
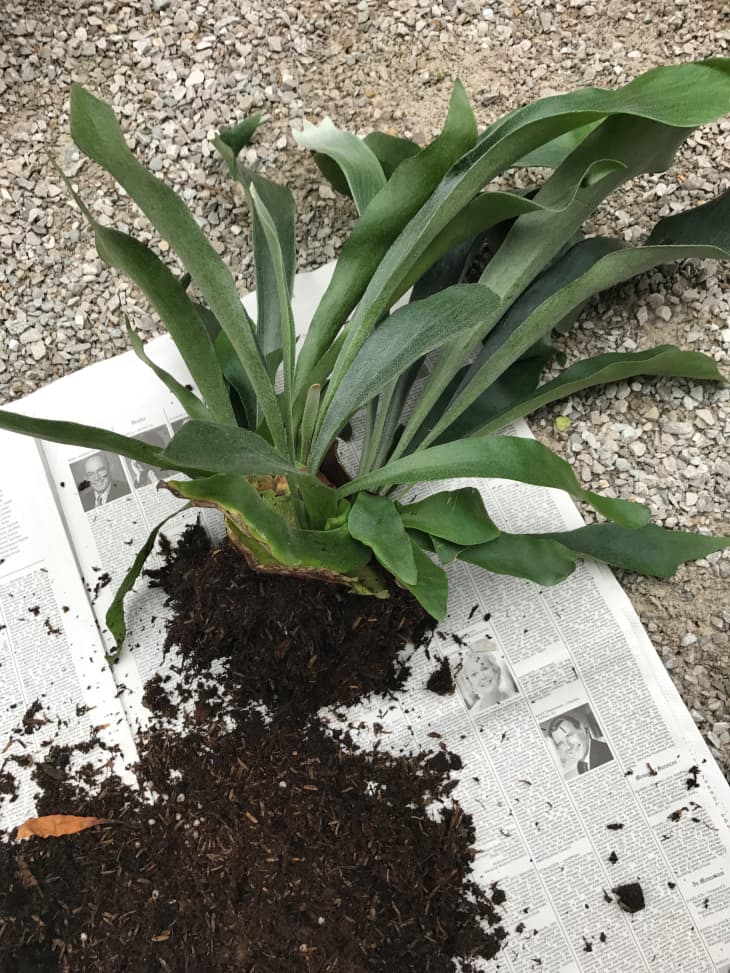
5. Remove fern from pot and loosen the old potting medium.
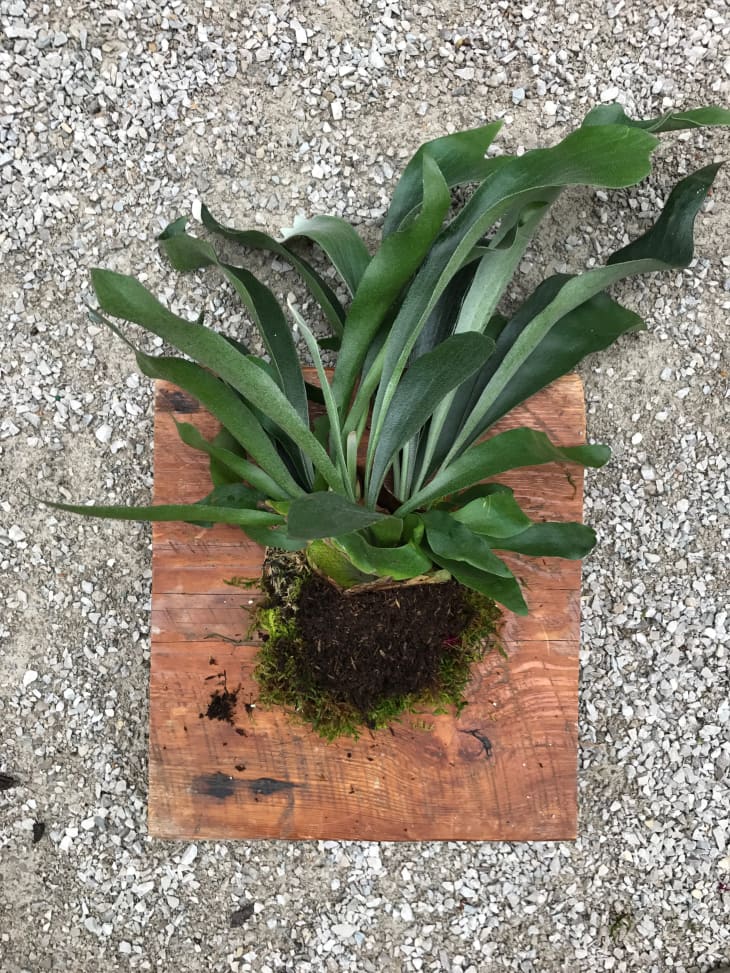
6. Spread out the roots and gently place the fern on the moss bed. You want your fern situated so the shield is facing upwards. Once you have it arranged to your liking, pack the area around fern with more damp sphagnum moss so the roots are covered.
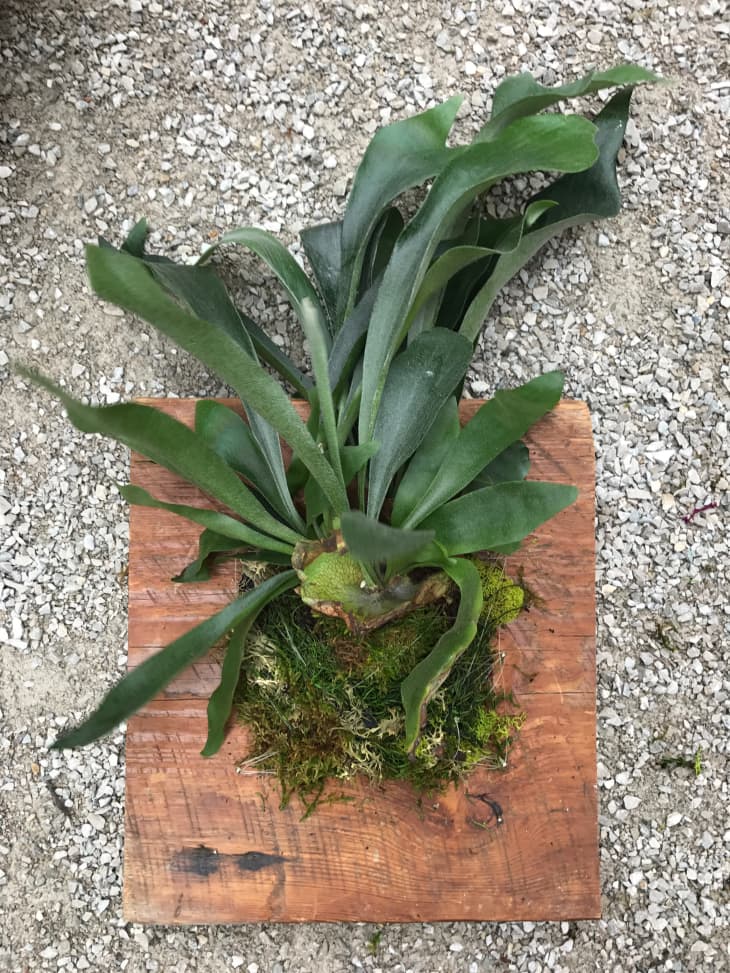
7. Take your fishing line and tie a knot, securing it to one of the nails. Wind the line around the fern, from nail to nail, creating a criss-cross pattern. You’re using the nails as support to wind the line around, trying to avoid catching the fronds in the line. Once the moss and fern are securely lashed to the board, tie off the line at one of the nails and trim excess line.
Tip: The fishing line is only a temporary hold until the fern attaches to the surface. The line will be visible at first, but don’t fear — new shield fronds and foliage will eventually grow and cover the line.
Proper Care
Your fern will do best with indirect, filtered sun and high humidity (around 60-65%). Water about once a week, always making sure that you allow the plant to completely dry out before re-watering. Even if the moss feels dry, the plant’s interior and roots could still be moist and over-watering will cause root rot. Some recommend you actually see them wilt before you water them again. To help with humidity levels, ferns love a light daily misting of water. You can fertilize your fern every to every other month with fish emulsion or a tropical plant food.
Staghorn ferns do not like temperatures below 40 degrees, so be prepared for bringing your stag in during colder weather.
If you notice fuzzy, brown brown patches that appear on the bottom side of the tips of older larger fronds, don’t fret, your plant does not have a disease. These are the spores so do not try to remove them.
– Re-edited from a post originally published February 24, 2011 – DF