
Before & After: A Kids Room Goes from DIY Mess to DIY Success
Meera knew she was going to have to get extremely crafty with her son’s new room. The previous owners had made some questionable (and potentially dangerous) choices that needed to be fixed immediately, and Meera was able to do so with some very cool DIYs and brilliant money-saving fixes.
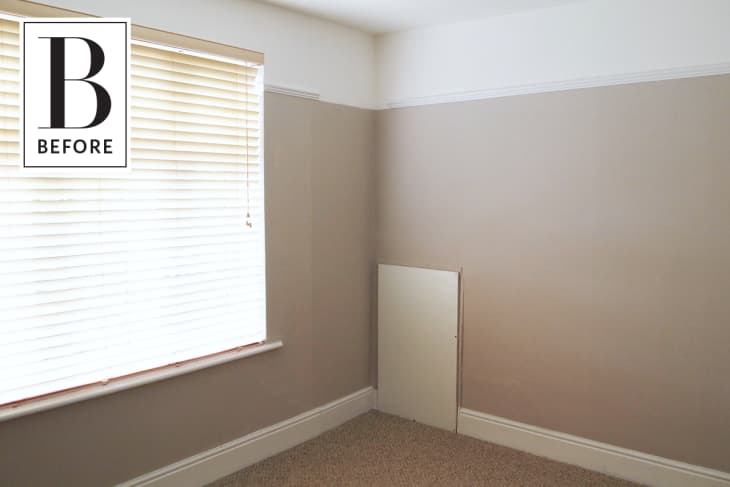
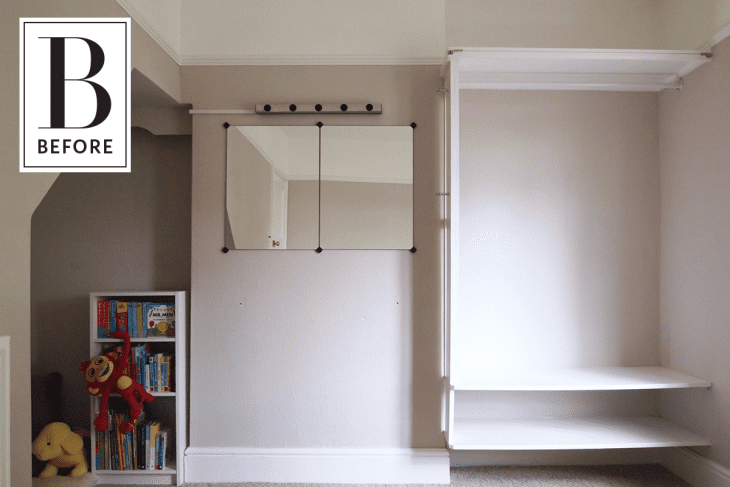
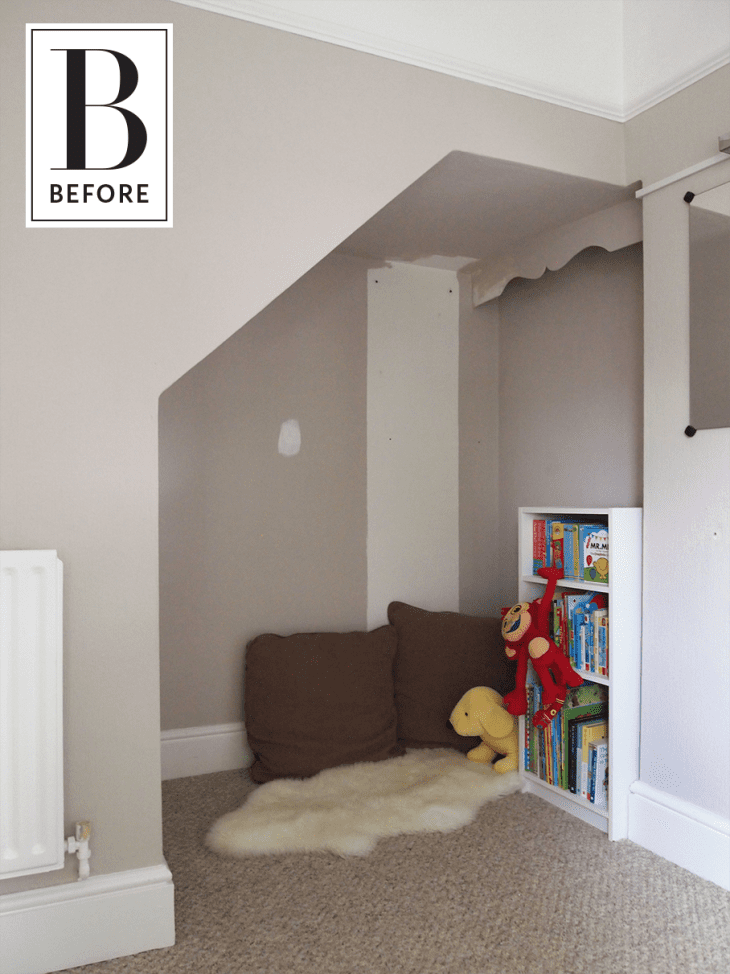
From Meera: The walls and ceilings were covered in poorly-hung textured wallpaper and the room was a DIY mess. The previous owners had used it as a dressing room and they left us with rather questionable ‘handiwork’ like a cable from one light to another running along the wall, a small bookcase embedded into the wall of the adjoining room which protruded into this room, an incomplete picture rail, some built-ins that had been glued onto the walls instead of screwed in … as I said, a DIY mess!
With all the fixtures that had been installed by the previous owners, the room didn’t work for a young child, so this was the first room I tackled.
The process started with removing all the built-ins and incomplete picture rail, and fixing the wall and skirting in the area where a bookcase had been embedded into the wall.
We needed to call upon a qualified electrician to remove the cabaret light and add sockets, which the room really lacked.
The ruined wallpaper was then stripped, but doing this uncovered walls that were not very smooth. We didn’t have the budget for re-plastering so we decided to hang thick lining paper to smooth out the lumps and bumps. This worked and was a treat!
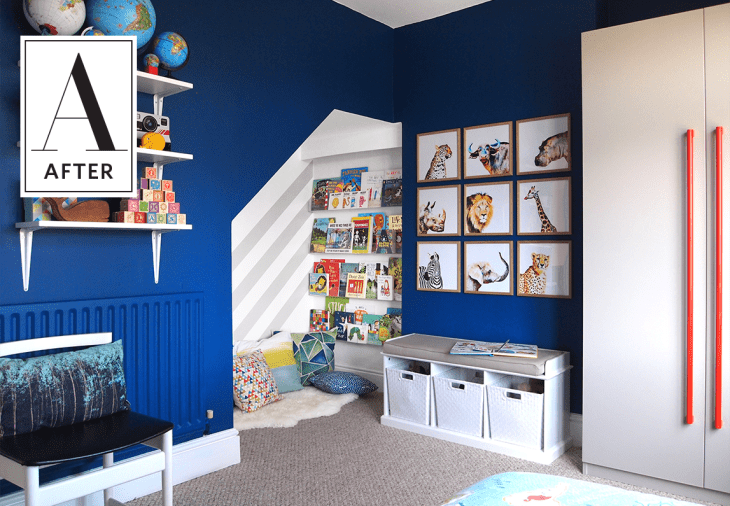
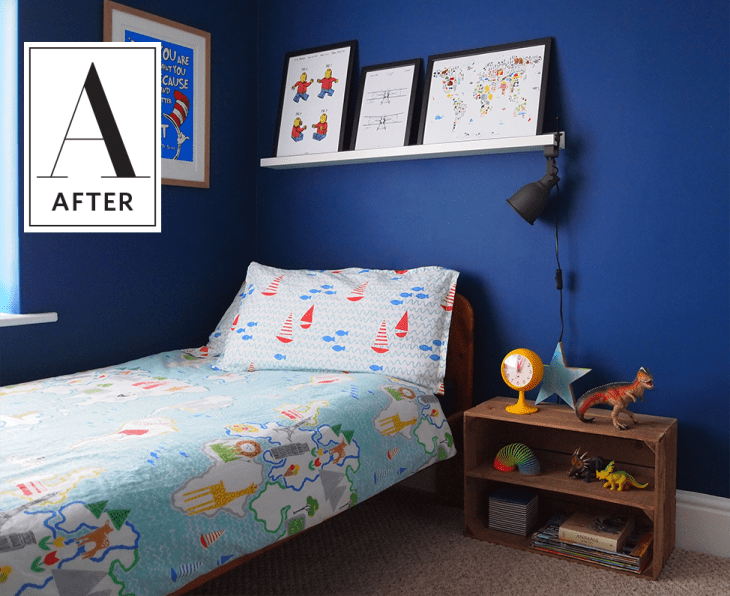
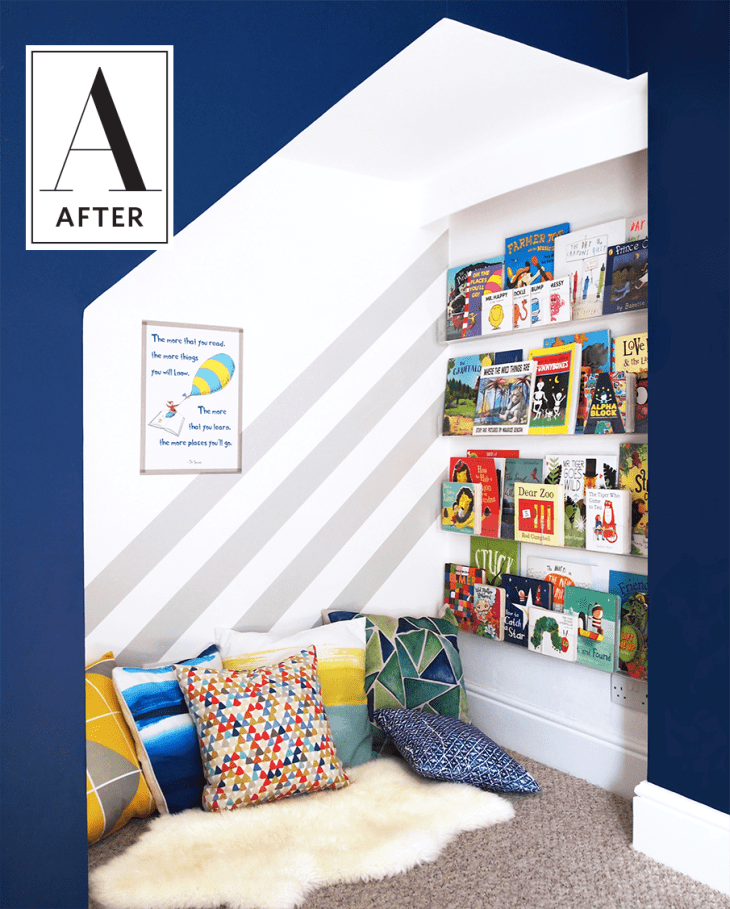
The room isn’t big but has a huge window bringing in oodles of natural light, so I knew a dark color would look beautiful in here. I chose a bold deep blue (Deep Space Blue by Little Greene) for all the walls except in the reading nook, which I painted in white (Loft White by Little Greene) as I wanted it to stand out from the blue.
Once it was painted, I felt that the nook needed a little something extra so I painted some stripes in grey (Fescue by Little Greene) to highlight the shape of the nook and make it look more interesting. I found clear acrylic retail display racks which make for the most perfect bookshelves as they allow the beautiful book covers to be fully seen. We love Dr. Seuss so I created a poster of one of our favorite quotes and attached it to the wall with washi tape. A soft sheepskin rug and geometric pillows in fun colors make it a cozy space.
The venetian blind was swapped for a double layer window treatment: a blackout roller blind outside the window recess and a sheer roller blind (for privacy and reducing sun glare) inside the recess.
An IKEA PAX wardrobe was given a cool look with long handles and paint. This was quite a long task, but totally worth it.
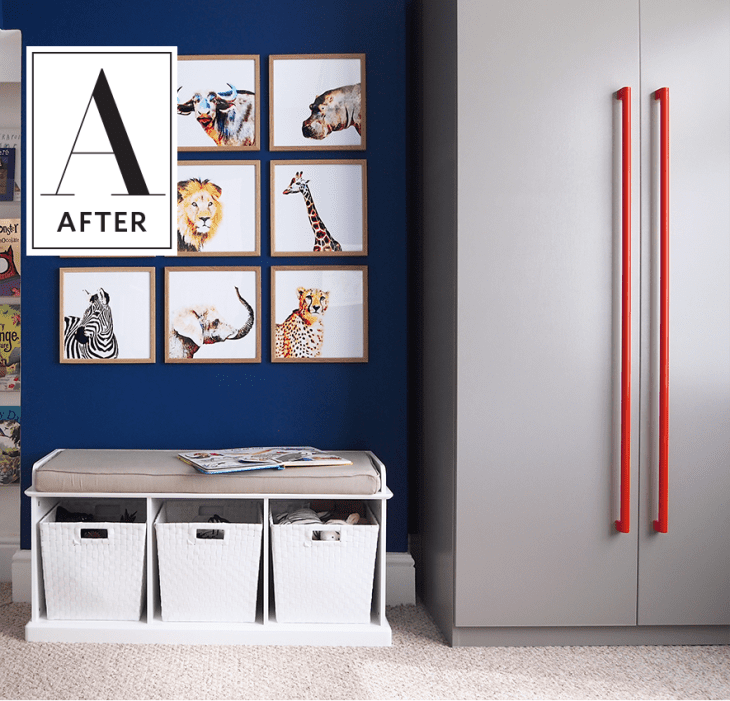
My son is wild about animals and had asked for animal pictures on his wall so I created a watercolor gallery of wild animals using free stock images and a watercolor app on my phone.
His bedside is completed with an apple crate and a clamp lamp which is attached to the picture ledge above his bed.
I love everything about the room now! More importantly, my son is very happy with it! I’m really pleased with how the painted IKEA wardrobe looks with the striking long red handles, and my animal-loving son is delighted with the watercolor animal gallery. The best feature of the room is the reading nook which turns into a fort during the day when the kids play there, and is used by all of us every evening for bedtime stories. I wouldn’t change a thing.
Meera’s words of wisdom: Decorating a child’s room can be a lot of fun; there’s no reason not to be bold with the design! To create a space that will grow with the child, I would suggest avoiding overly-themed products and baby-ish motifs. Incorporate the child’s interests in ways that are easy to swap out (e.g. the animal gallery can be changed for pictures of another subject should my son request it in future, or he can fill his shelves or picture with objects that interest him).
There was quite a bit of DIY required for this room and without much prior experience, research was key. When I have an idea and want to try something out, like painting the IKEA wardrobe, or achieving super-sharp painted stripes in the reading nook, I read up as much as possible about how other people have done it and what materials are best. I then blog about it to keep the knowledge sharing going! So I would say read the advice and tutorials from others who have tackled projects similar to what you want to do.
Thank you Meera! You can see more on Meera’s blog Arty Home.
How To: