
DIY Renovation Project: How To Build a Recessed Shower Shelf
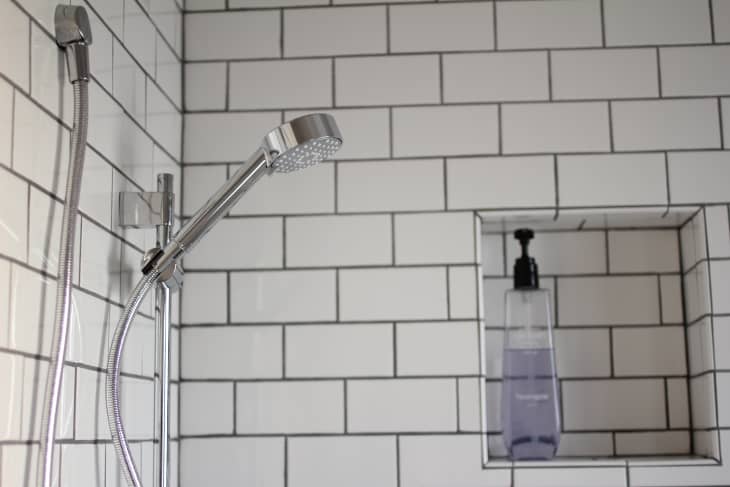
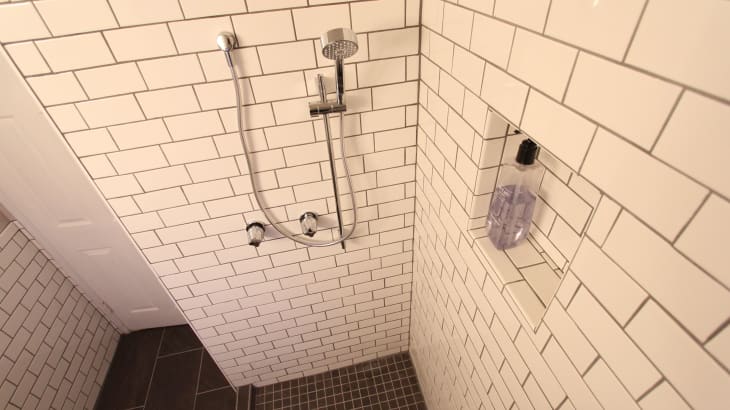
When remodeling a bathroom, consider adding a recessed shower shelf into your design. It’s a practical and streamlined way to add storage space for shampoos and soaps, without taking away elbow room. Built-in shower niches are also a great alternative to gunky corner shelves and rusty shower caddies. For all of you DIY renovators, read on to learn how to build a shower shelf of your own.
What You Need
Materials
- Thinset
- Quick-dry leveling thinset
- 2x4s
- Backerboard (we used Wonderboard)
- Backerboard tape
- AquaDefense
- Tile
- Painters tape
- Grout
- Caulk
Tools
- Mini circular saw
- Mallet
- Shop vacuum
- Level
- Trowel
- Stud finder
- Respirator mask
- Safety goggles
- Gloves
Instructions
Planning
1. Using your stud finder, find the space in between studs where you would like your shelf. Keep in mind that it needs to be large enough to fit your shampoos and soaps.
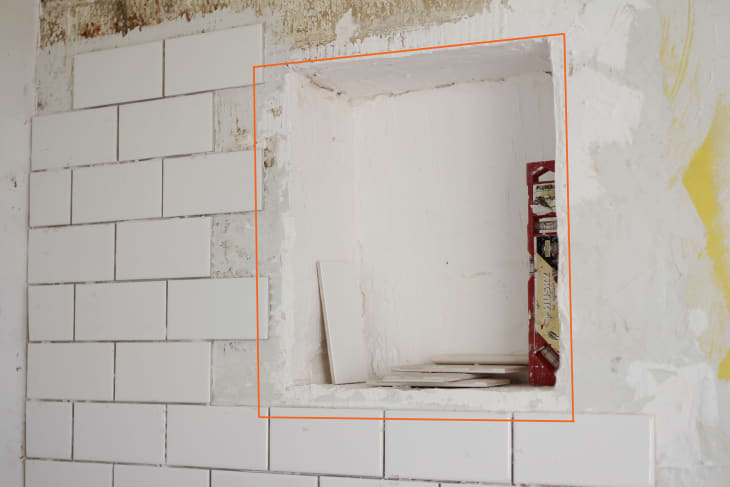
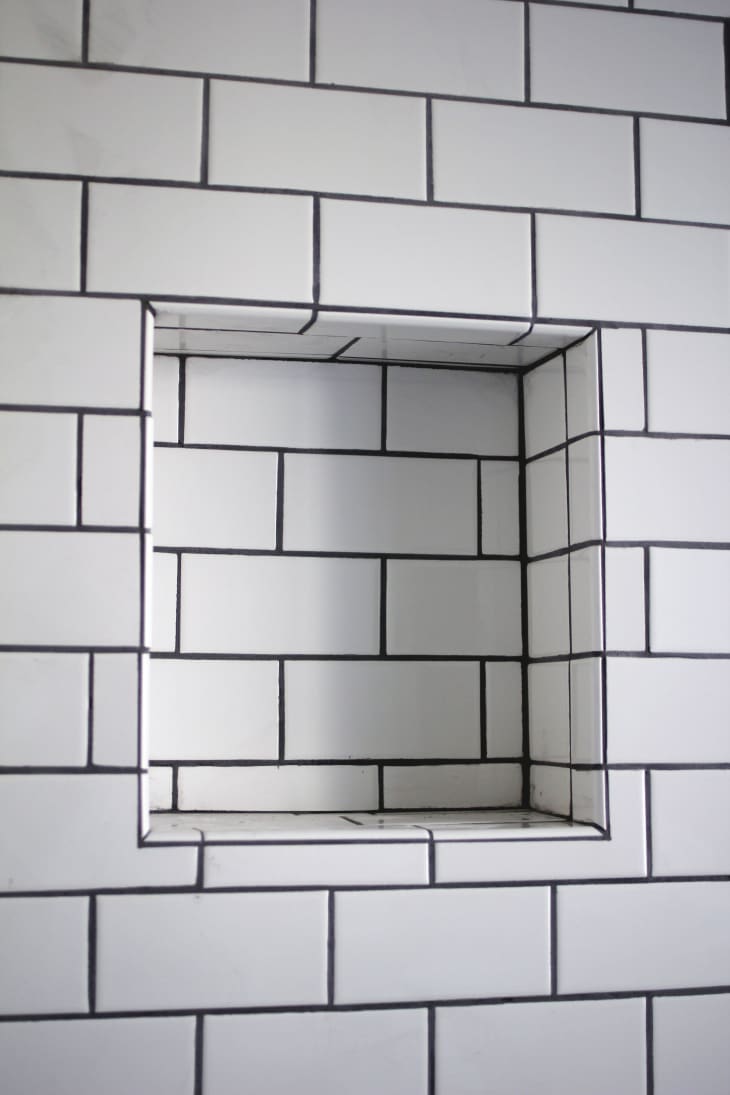
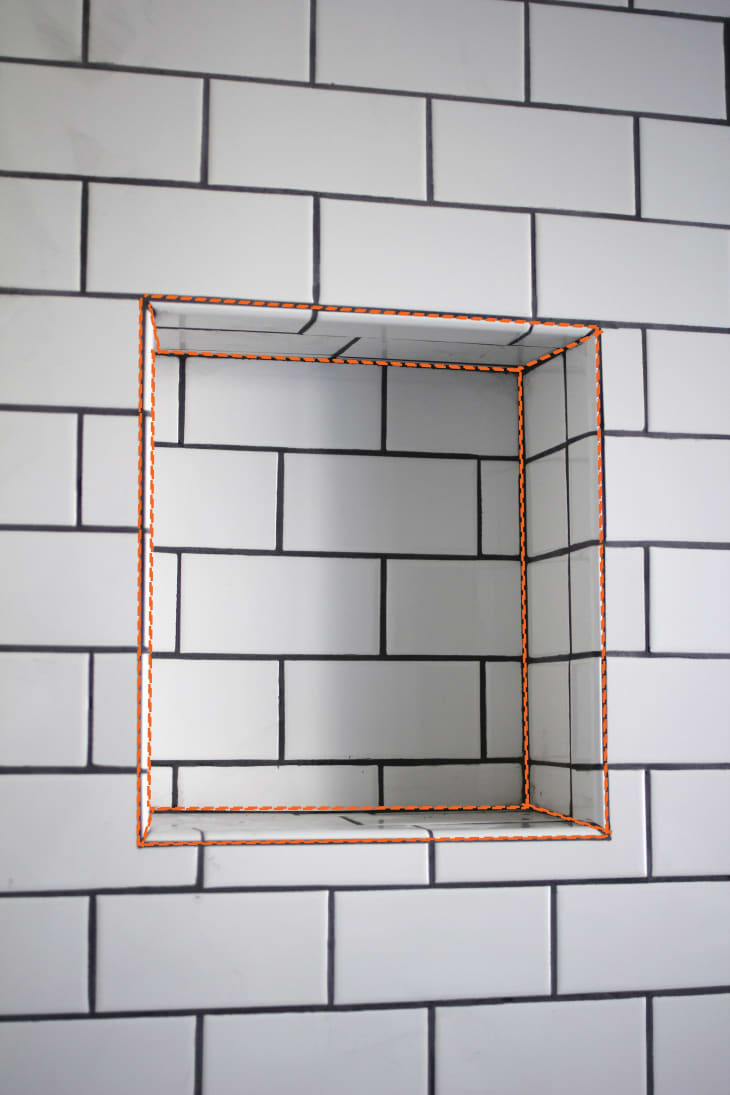
2. At this point, we’ll assume you’ve tiled the rest of the wall leading up to the general proposed shelf area. If possible, you want your niche to fit seamlessly in your tile design. In other words, the bottom and top of the niche should start and end at the grout lines. Eventually you’ll cut a rectangle that is about 3/4″ larger (the orange lines above) than where your grout lines meet in order to give space for the backerboard and tile that will later be installed inside the niche.
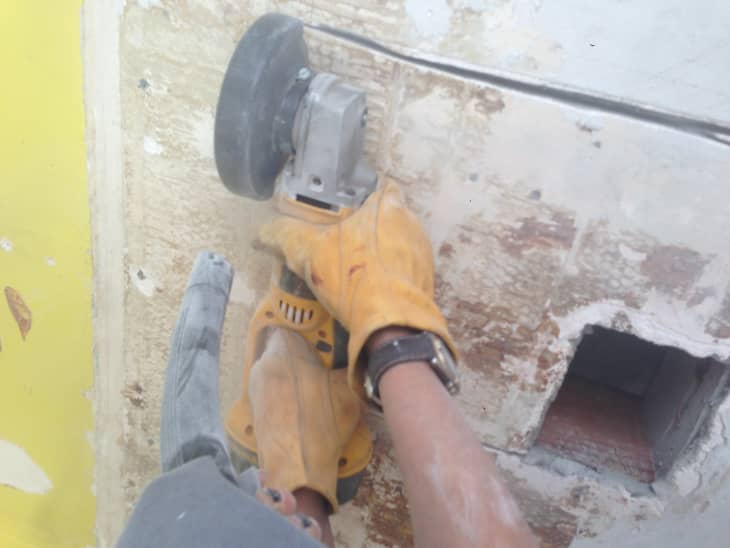
2. First cut a small rectangle within the planned area, just to make sure there are no pipes or other studs where you want the shelf to go.
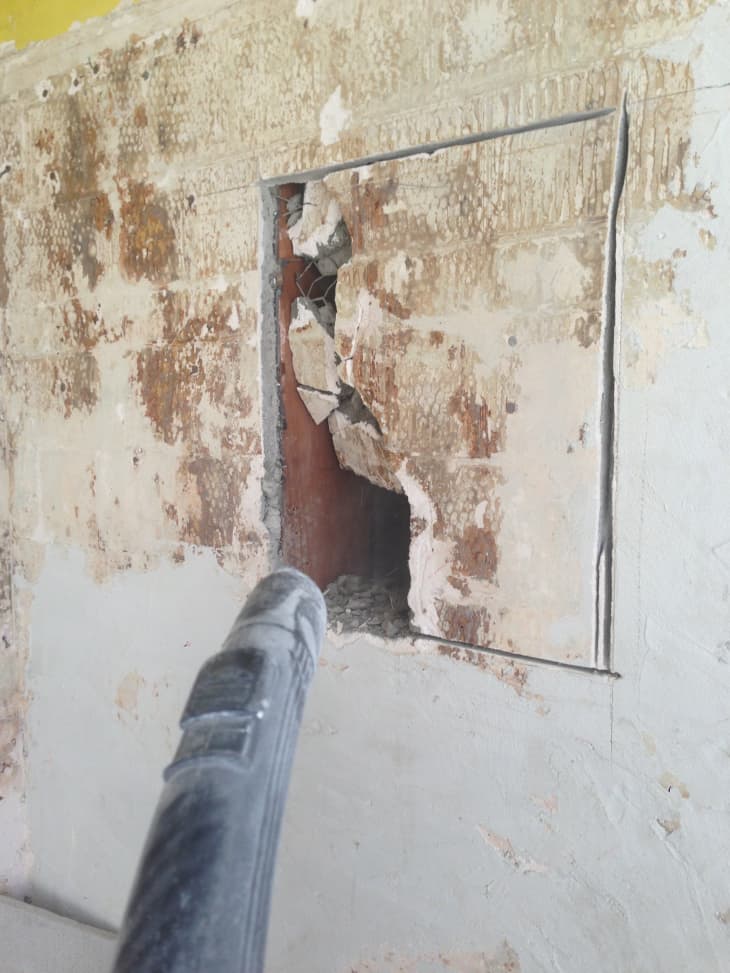
2. If everything looks good, make your larger cuts using the handheld circular saw. Have another person hold a shop vac as you are cutting to prevent debris from becoming airborne. When finished with your cuts, continue cleaning out any excess debris with the shop vac.
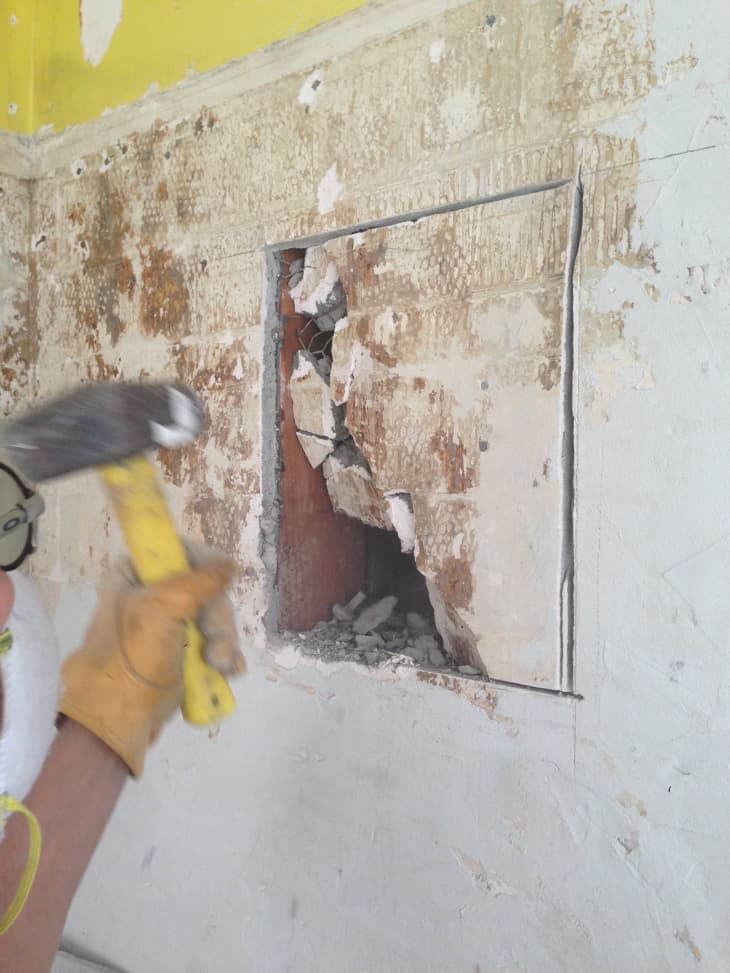
3. Carefully hammer a corner to loosen the backerboard. In our case, our walls were made of solid concrete, so we had to hammer most of it out.
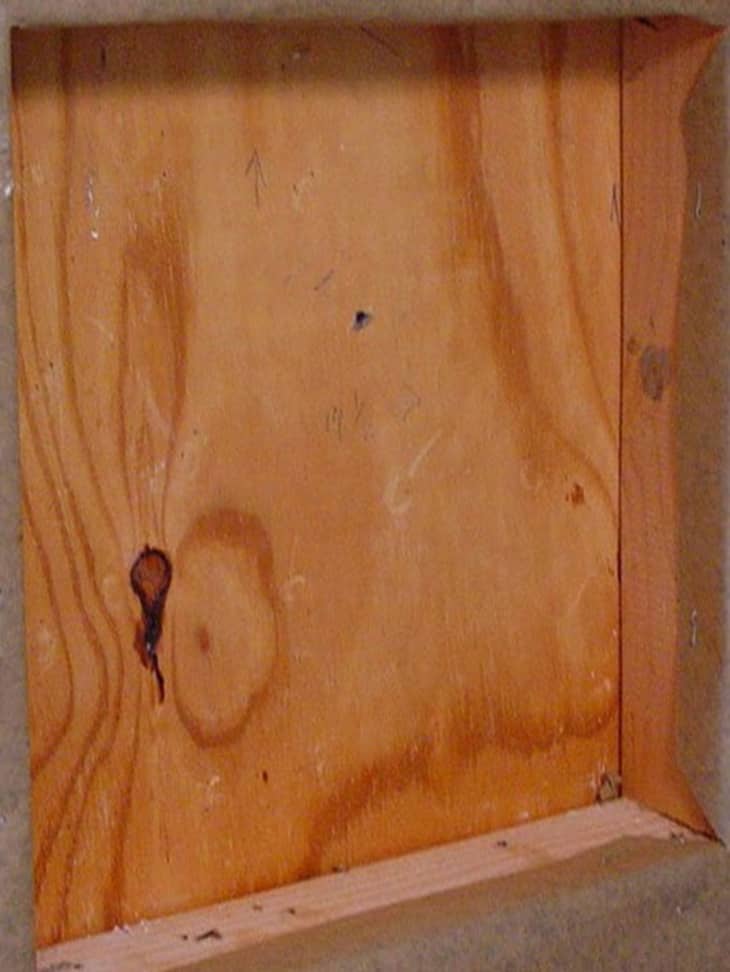
4. Depending on what’s behind your wall, you may need to use a piece of plywood or backerboard as the back wall of your niche. You also need to build a frame to support your niche. In this case, ours was right in between three studs, so we only needed to screw in one 2×4 to the top part of the cut out space. This will vary depending on where your placement is in the wall.
5. After your frame is set, ensure the frame is leveled. If it’s not, apply the quick-drying leveling thinset where needed. Then cut five pieces of backerboard: one for each of the four sides, and one for the back of the shelf.
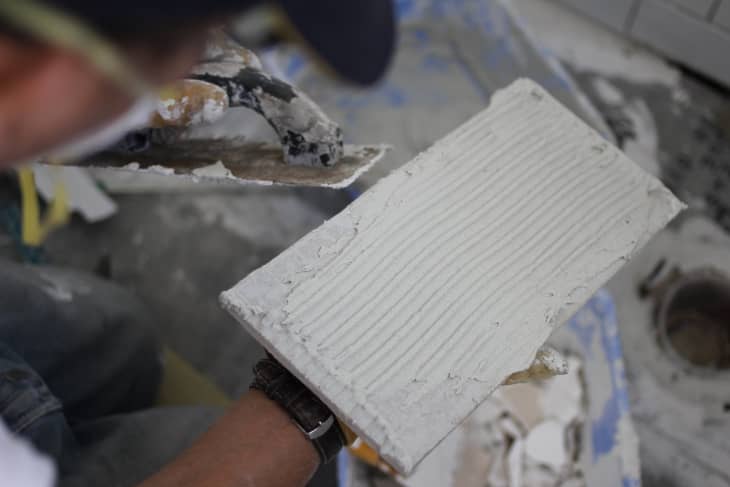
6. Apply thinset adhesive to the inside of your niche and back butter the backerboard.
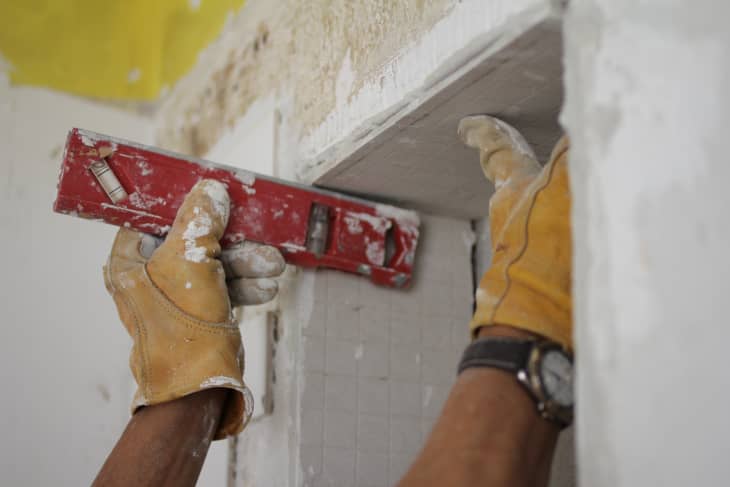
6. Using your level, ensure the back, top, and side backerboards are properly leveled horizontally and vertically. More importantly, ensure the bottom shelf of your niche is slightly sloping in the direction toward the shower, so if there is any water in the niche it will properly drain.
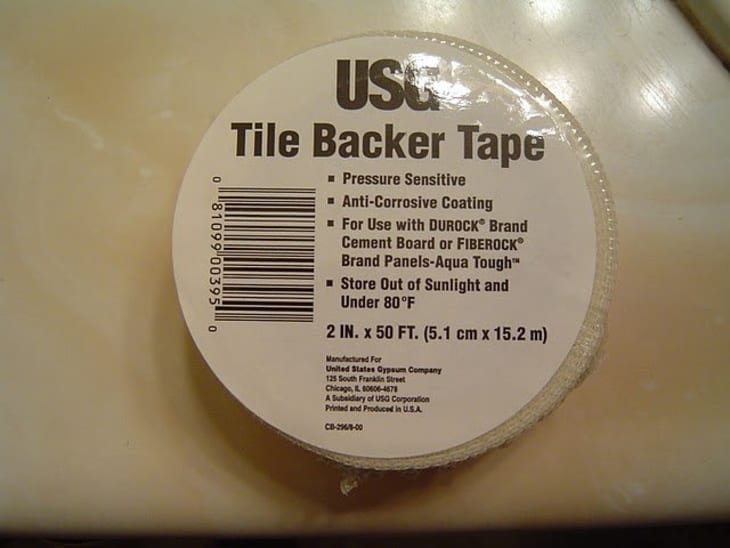
7. Tape seams using tile backer tape or fiberglass mesh tape. Apply the quick-drying thinset to the seams and seal and crevices. Coat all seams with AquaDefense waterproofing liquid. Then apply two coats of AquaDefense to the entire niche.
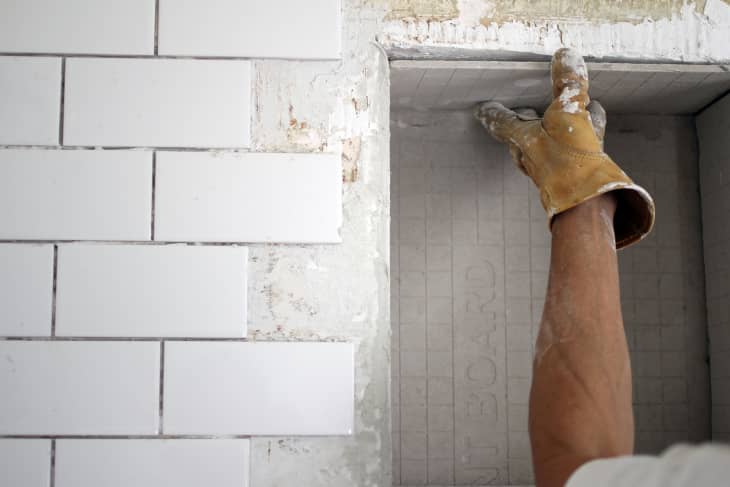
8. Cut and lay bullnose tile along the edge of your niche so they integrate to your tile design and grout lines. Cut and lay any other necessary tiles in order to meet up with other pre-existing wall tile. (See this tutorial for how to tile.)
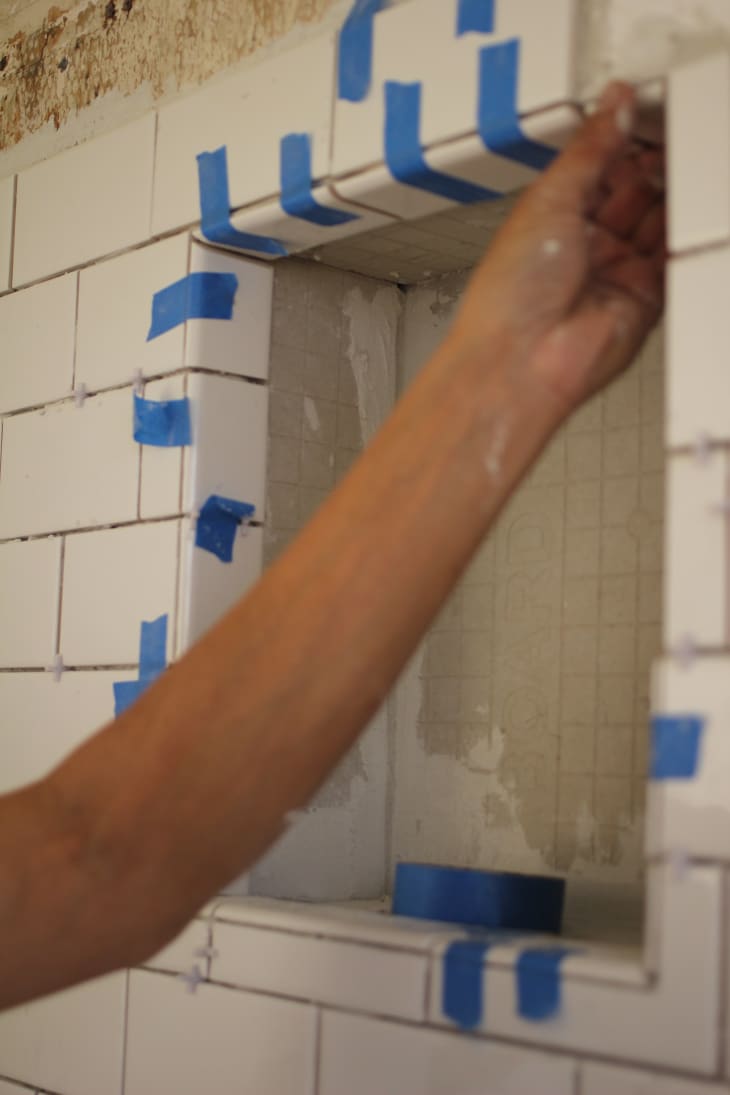
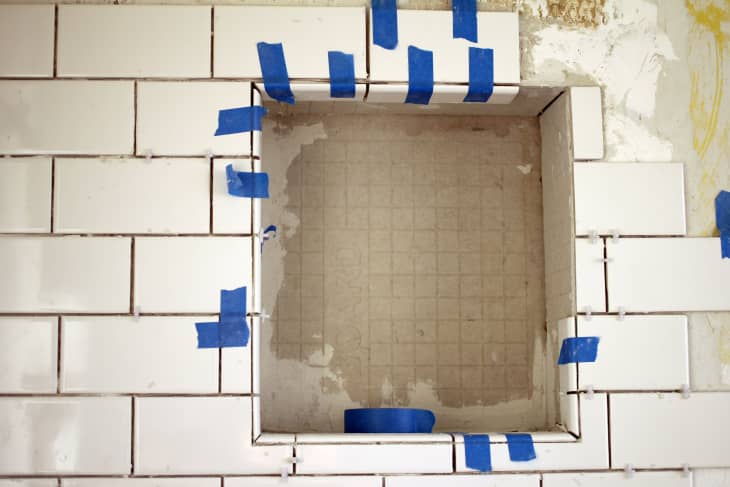
9. Use tape to hold tiles in place.
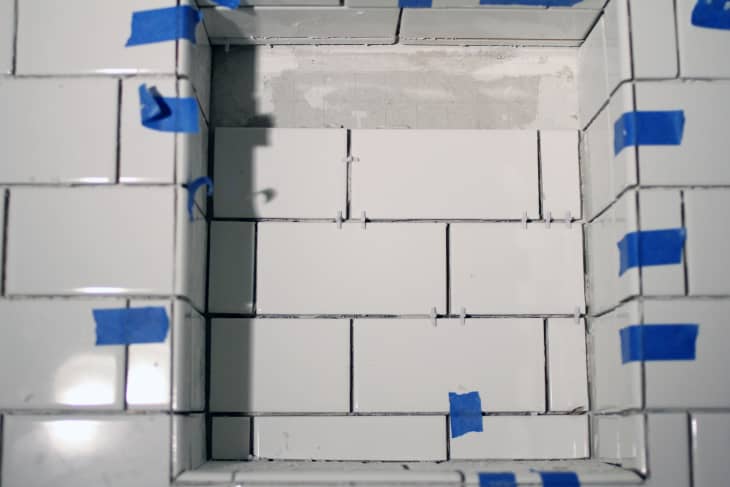
10. Consider the design of tiles on the back of the niche so it integrates into the rest of the tile design. Try to continue the tile pattern from the walls and into the niche without breaking the pattern.
11. Apply grout along lines on the same plane. Use caulk along any corners and change of plane (seen above as orange lines).
12. Let grout cure according to manufacturer’s directions. The last step is to seal grout lines. Simply use a paint brush and dip it in the grout sealant, then apply it to the lines. Wipe off any excess sealant.
For more shower niche ideas, click here.
Have a really great DIY project or tutorial that you want to share with others? Let us know! We love checking out what you’re making these days, and learning from our readers. When you’re ready, click here to submit your project and photos.